How to Add Image Grid Gallery to React Apps
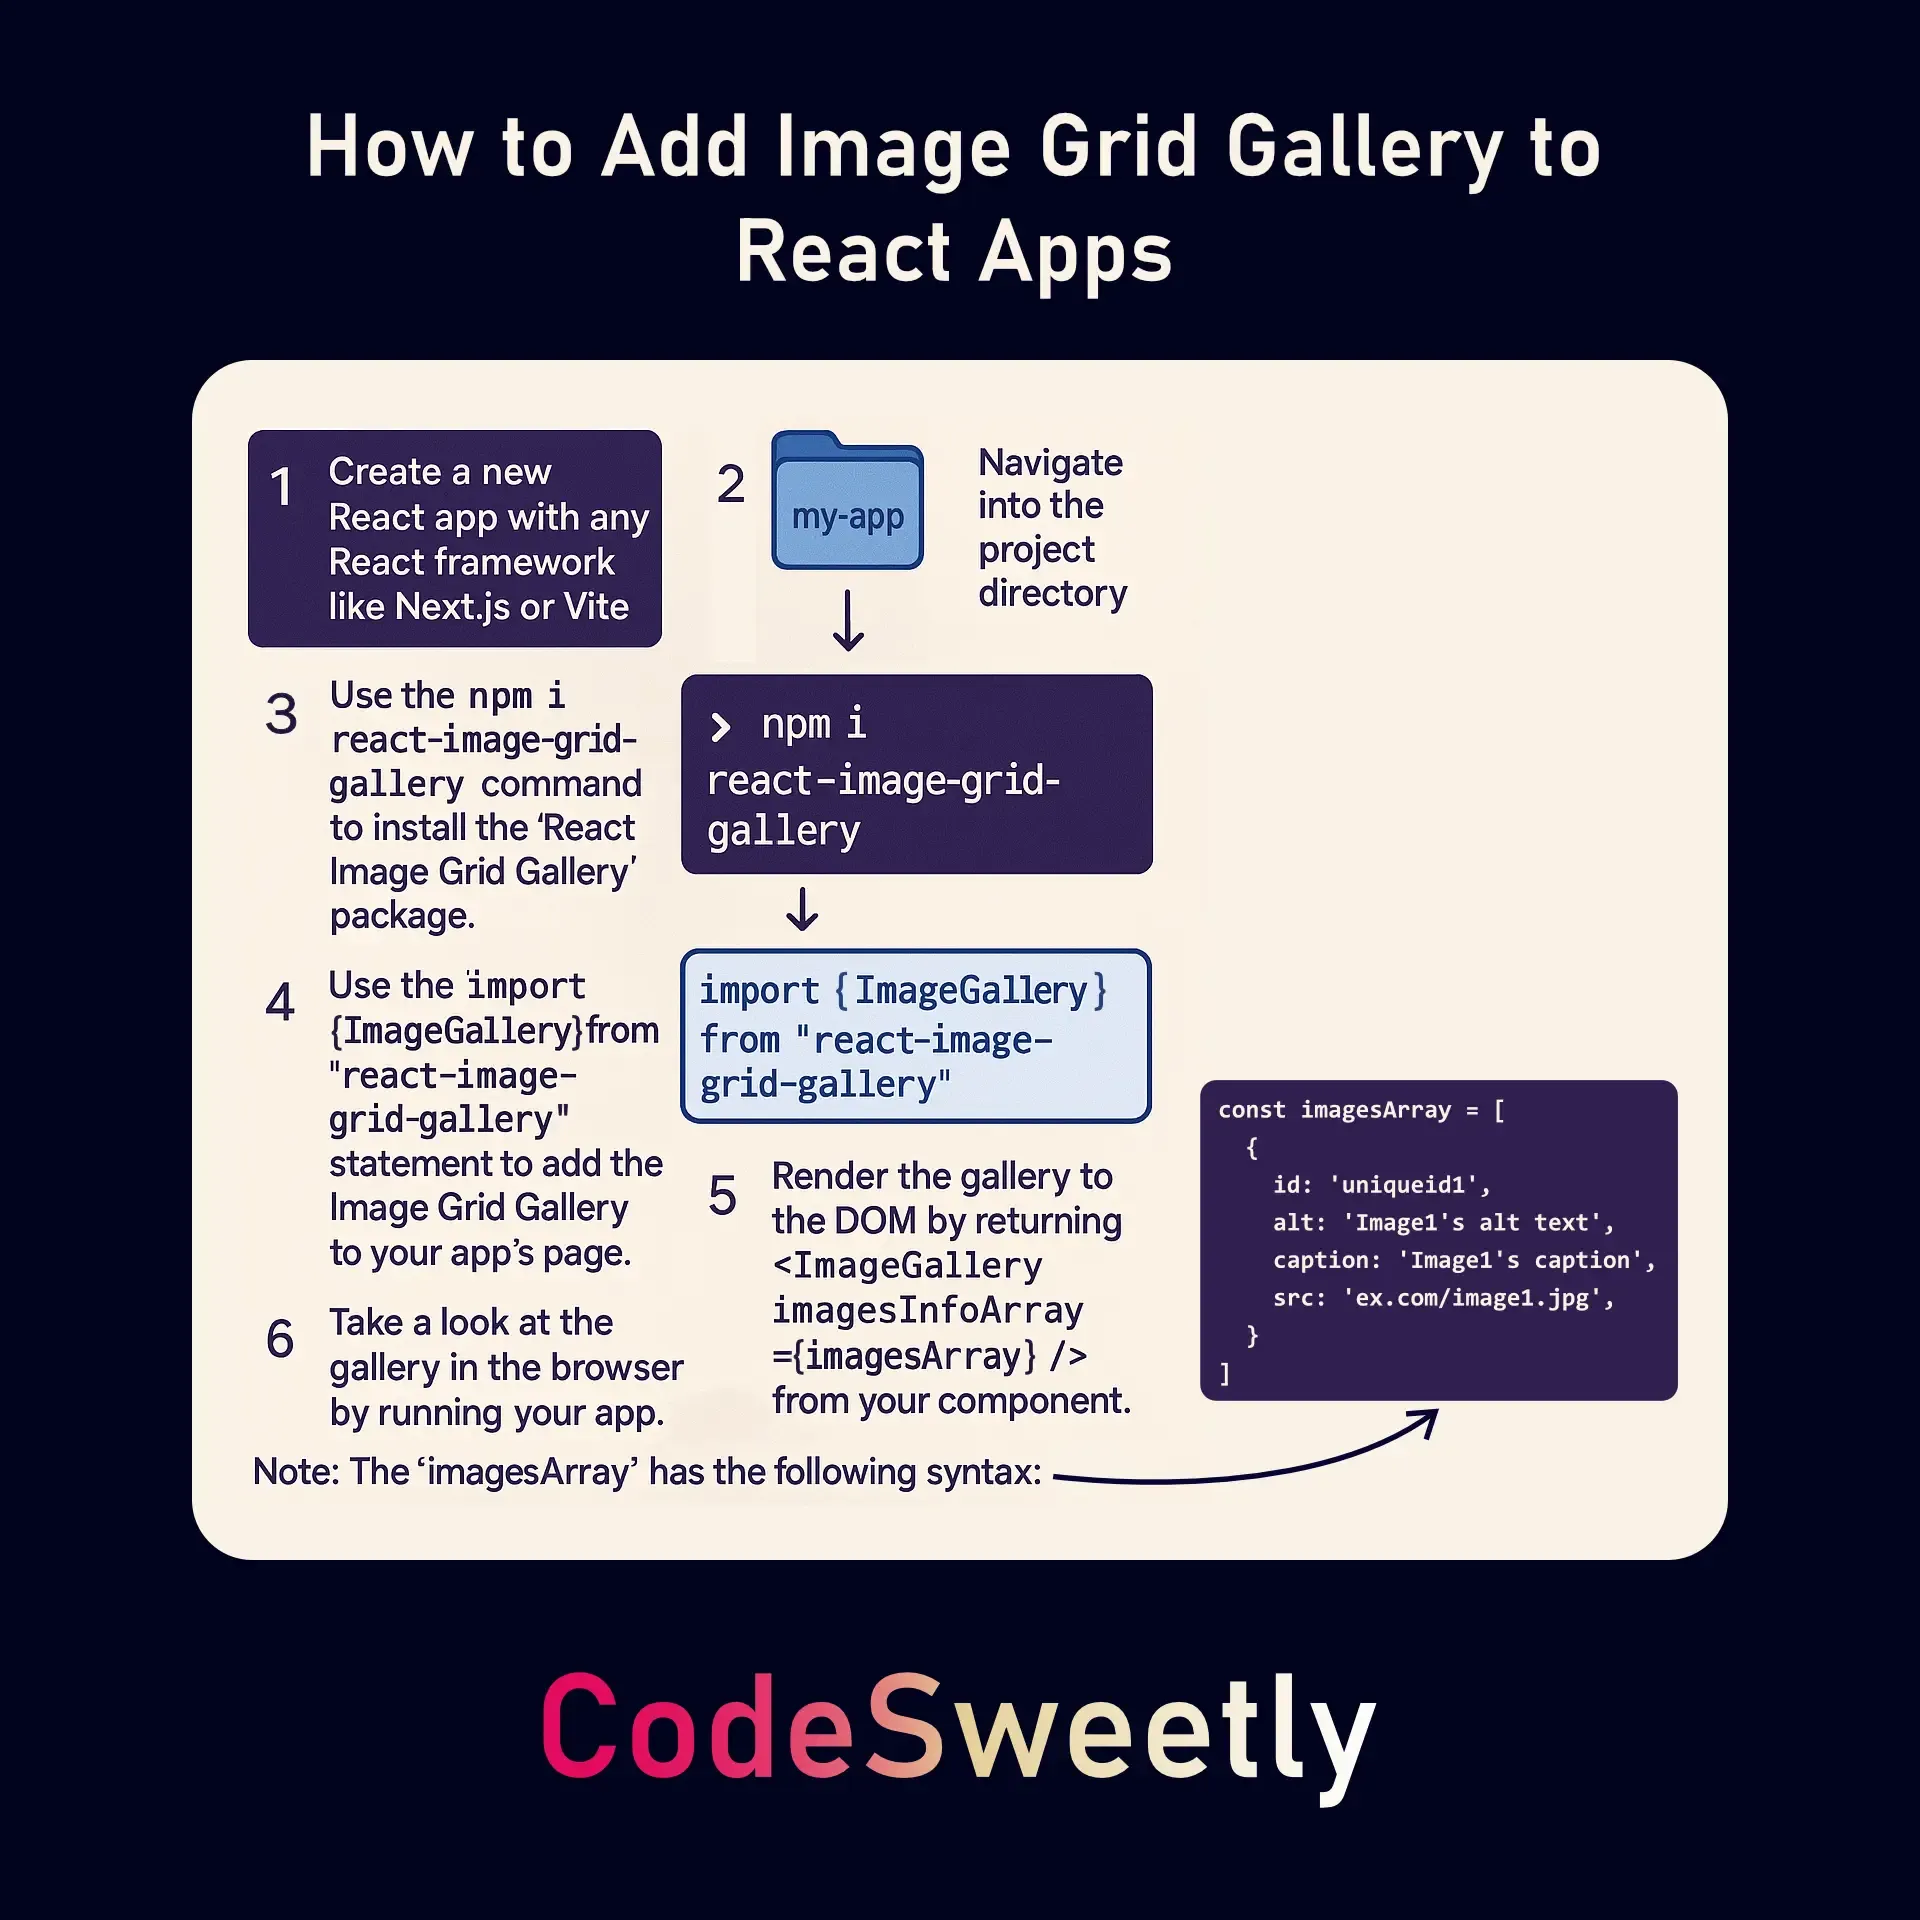
The react-image-grid-gallery is a simple and easy-to-use component with a lightbox for displaying a grid of images in React apps.
Here are some of the package’s features:
- SEO friendly
- Fullscreen support
- Keyboard accessible
- Mobile responsive
- Lightbox with translucent background
- Thumbnails
- Image captions
- Lazy loading support
- Set column numbers dynamically or manually
- Resolution switching compatible
- Customizable styles
This article will use a simple project to explain how to use the library to add image galleries to your React applications.
Here is a demo of what we will build:
http://localhost:3000
So, without further ado, let’s start with the first step.
Step 1: Get the Right Node and NPM Version
Section titled “Step 1: Get the Right Node and NPM Version”Make sure you have Node 18.18 (or greater) and NPM 10.9 (or greater) installed on your system.
Step 2: Create a New React App
Section titled “Step 2: Create a New React App”Use the create-next-app package to create a new React app.
npx create-next-app@latestAlternatively, you can use Yarn or pnpm to configure your project like so:
yarn create next-apppnpm create next-appAfter running the above command, Next will ask the following questions:
- Ok to proceed? (y) Enter the y key on your keyboard to proceed.
- What is your project named? You can name it anything you wish—for instance,
react-image-grid-gallery-demo-001. - Would you like to use TypeScript with this project? » No / Yes Select No, as we will use plain JavaScript in this tutorial.
- Would you like to use ESLint with this project? » No / Yes Select No as we do not wish to use ESLint in this tutorial.
- Would you like to use Tailwind CSS with this project? » No / Yes Select No as we do not wish to use Tailwind CSS in this tutorial.
- Would you like to use
src/directory with this project? » No / Yes Select No as we do not wish to use thesrc/directory in this tutorial. - Use App Router (recommended)? » No / Yes Select Yes as we are ok using Next’s App router configurations. (Don’t worry if you know nothing about the App Router. We are only using Next’s basic functionalities to learn how to create an image gallery.)
- Would you like to use Turbopack for
next dev? » No / Yes Select No. - Would you like to customize the default import alias? » No / Yes Select No as we are okay with using Next’s default import alias for this test-app.
Once you’ve answered all the questions, Next.js will create your new app.
Step 3: Go Inside the Project Directory
Section titled “Step 3: Go Inside the Project Directory”After the installation process, navigate into the project directory like so:
cd react-image-grid-gallery-demo-001Step 4: Install the Image Grid Gallery Package
Section titled “Step 4: Install the Image Grid Gallery Package”Using your text editor, install the React Image Grid Gallery locally.
npm install react-image-grid-gallery --saveStep 5: Import the Image Grid Gallery Package
Section titled “Step 5: Import the Image Grid Gallery Package”Open the page.js file located in the app folder of your Next.js application.
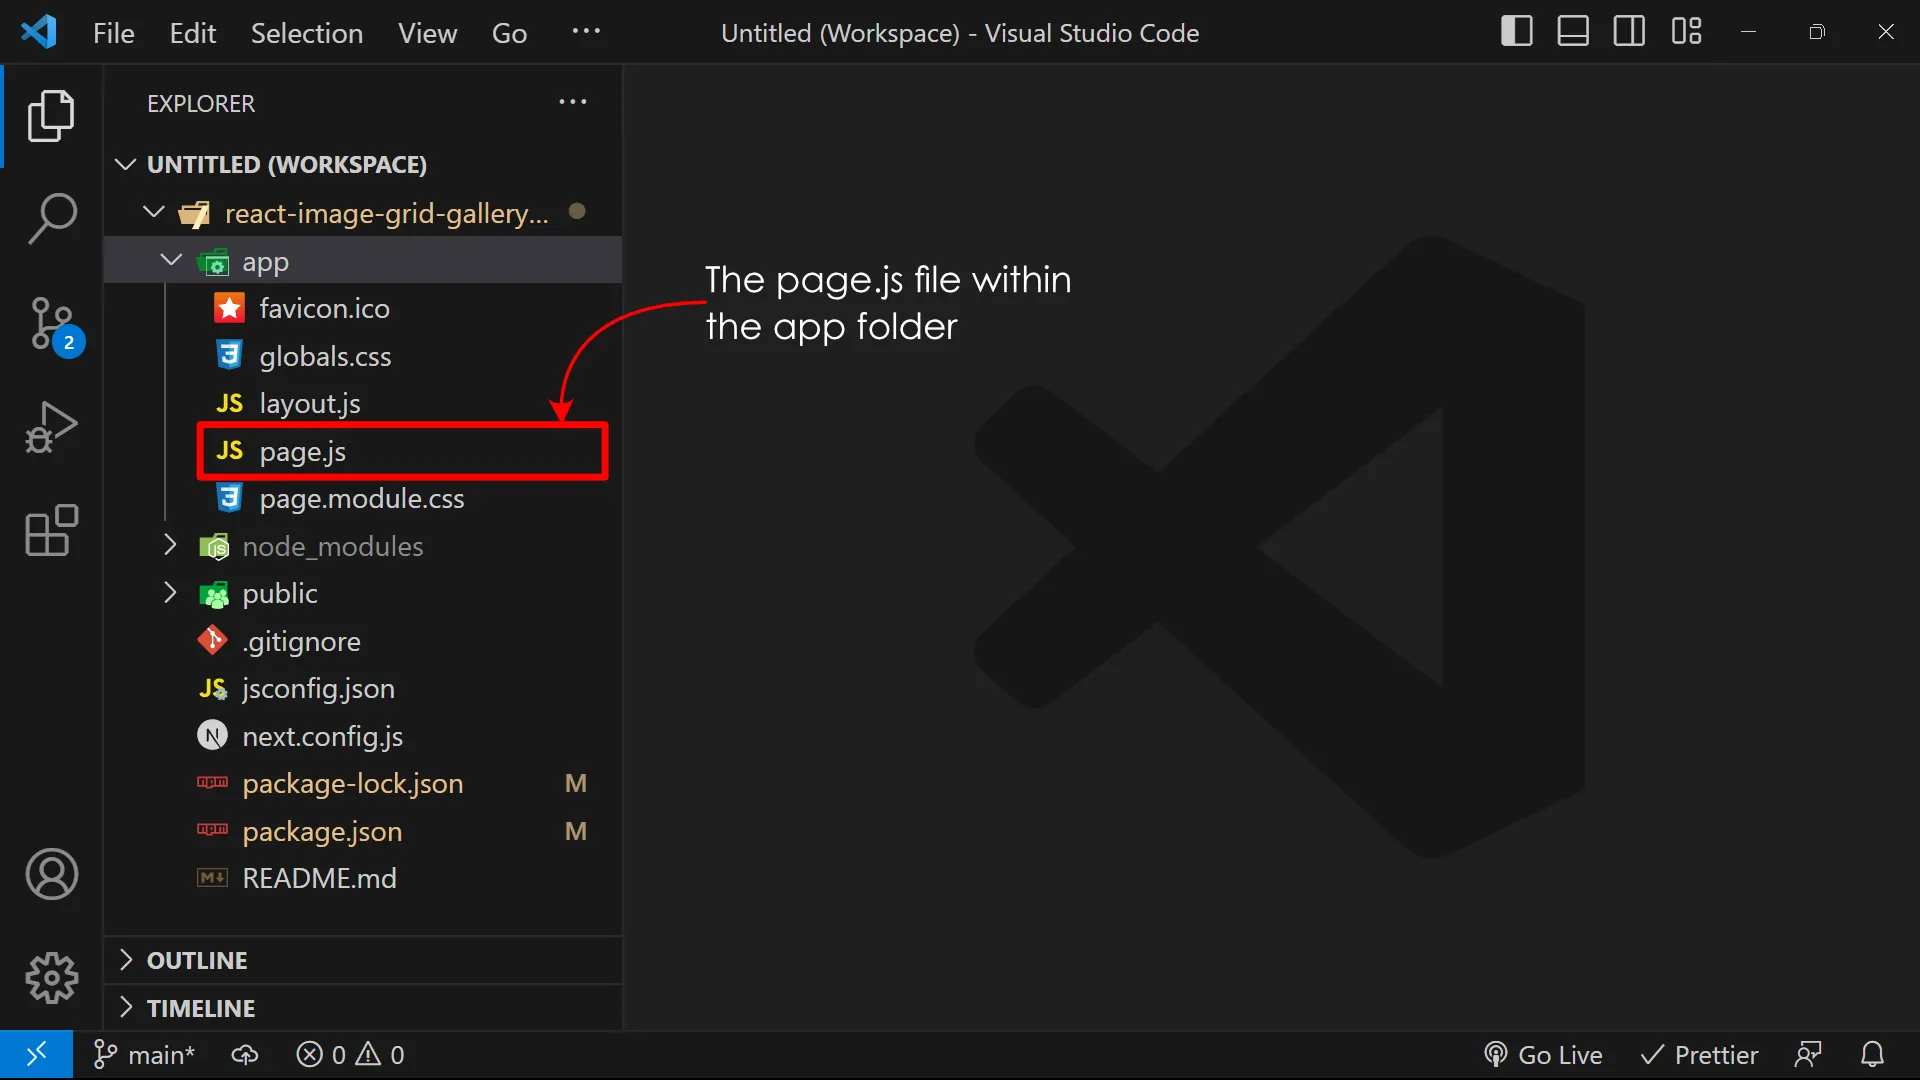
page.js file within the app directoryThen, delete all its content. And import the image grid gallery package like so:
"use client";
import { ImageGallery } from "react-image-grid-gallery";Step 6: Render the Image Gallery Component
Section titled “Step 6: Render the Image Gallery Component”After importing the gallery package, render it to the DOM as follows:
"use client";import { ImageGallery } from "react-image-grid-gallery";
const imagesArray = [  {    id: "uniqueid111",    alt: "Image1's alt text",    caption: "Image1's description",    src: "http://example.com/image1.jpg",  },  {    id: "uniqueid222",    alt: "Image2's alt text",    caption: "Image2's description",    src: "http://example.com/image2.png",  },  {    id: "uniqueid333",    alt: "Image3's alt text",    caption: "Image3's description",    src: "http://example.com/image3.webp",  },];
export default function App() {  return <ImageGallery imagesInfoArray={imagesArray} />;}
The ImageGallery component accepts the following props:
| Props | Type | Default | Description |
|---|---|---|---|
imagesInfoArray | array | undefined | (Required) An array of objects containing the following properties:
|
columnCount | number or keyword (string) | "auto" | (Optional) The number of columns. |
columnWidth | number or keyword (string) | 230 | (Optional) The minimum width of the gallery’s columns. |
gapSize | number | 24 | (Optional) The gallery’s gap size. |
fixedCaption | boolean | false | (Optional) Specify whether to display the image captions permanently (true) or to hide them by default and ease them in on mouse hover (false). |
thumbnailBorder | string | "3px solid #fff" | (Optional) The thumbnail’s border style. |
lazy | boolean | true | (Optional) Specify whether to lazy load images. |
lazyFromIndex | number | 6 | (Optional) The image’s index to begin the grid’s lazy loading. Tip: Use a negative number to lazy load all the images. |
customStyles | ImageGalleryStylesType | {} | (Optional) Custom styles to override the following element’s default styles:
|
Step 7: Run the Application
Section titled “Step 7: Run the Application”Take a look at your app in the browser by running the following:
npm run devNote for Docusaurus users
Section titled “Note for Docusaurus users”Did you get a ReferenceError: crypto is not defined error during the build step? If so, this note is for you.
Wrap the ImageGallery component in <BrowserOnly> if you get a ReferenceError: crypto is not defined error during your build step.
import BrowserOnly from "@docusaurus/BrowserOnly";
function YourComponent() {  return (    <BrowserOnly fallback={<div>Loading...</div>}>      {() => {        const ImageGallery = require("react-image-grid-gallery").ImageGallery;        return (          <ImageGallery            imagesInfoArray={imagesArray}            columnCount={"auto"}            columnWidth={230}            gapSize={24}          />        );      }}    </BrowserOnly>  );}
This process is essential if your imagesArray uses the Web Crypto API. The <BrowserOnly> component tells Docusaurus to render the ImageGallery library only in the browser. It ensures that the Crypto API runs only in CSR (Client-Side Rendering) rather than during build or SSR (Server-Side Rendering).
Note for Remix Users
Section titled “Note for Remix Users”Remix users should add "react-image-grid-gallery" to their remix.config.js file:
/** @type {import('@remix-run/dev').AppConfig} */module.exports = { ignoredRouteFiles: ["**/.*"], serverDependenciesToBundle: ["react-image-grid-gallery"], serverModuleFormat: "cjs",};The serverDependenciesToBundle field tells Remix to transpile and include the "react-image-grid-gallery" package in the server bundle.
Live Demo
Section titled “Live Demo”Below is a live demo of the React Image Grid Gallery.
Loading...
Although we used the react-image-grid-gallery library to create an image gallery in a simple project, you can use the same principles on any React application.